It’s time to start planning for holiday gifting! And one of my favorite crafty things to do is create beautifully wrapped gifts. I’ll be sharing some fun wrapping DIYs for the holidays starting today!


Paper Source Wrapping Paper Calendar
If you haven’t seen this yet and you’re a paper/gift wrap/craft lover, then you need to pick one of these up. This calendar is one of the best ideas Paper Source has created in the last few years. It’s gigantic at 24.75” x 19.25” and the design is about 16″ x 20″ which is a great size. It’s absolutely gorgeous hanging on the wall and definitely a statement piece.
August Pattern

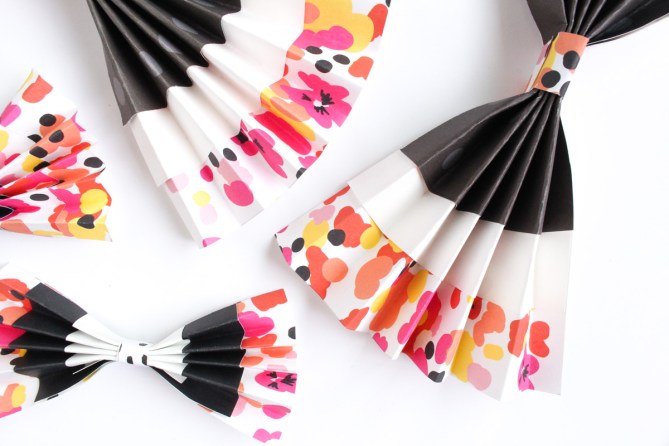
I love the color combo—it’s bright and cheery with bold pops of black and white. I decided to do a little crafting with this idea but I wanted to make sure to tie it in with gift wrapping. These accordion paper bows would be fantastic on a gift or bag or as a garland! And holiday gifts, of course!
Materials

Decorative paper in three colors (I used the Paper Source calendar, Superfine White, Vanilla Bean gift wrap scraps, and two 12x12s in black and polka dots)
Scissors
Washi tape
Double-sided tape
Bone folder (optional)
Ruler
Basic Idea

Start with a square. The larger the square, the larger the bow. When thinking about size, know that it will be the bottom layer and will be the width of the bow. I created 4.25”, 5.5”, 6”, and 8” squares. Measure and cut the number of squares desired.

Cut the second or middle layer. This layer will be the height of the bow, but you’ll cut anywhere from ¾” to 1.5” inches off this layer. The width will depend on how much of the bottom layer you want to see. I cut them a bit wider at 1.5”. Then cut the top layer. Again, the layer will be the height of the bow, but you’ll cut the width ¾” to 1.5” smaller than the middle layer. Again, I chose to cut more off to reveal more of the middle layer.
Cut several strips of paper that will serve as the middle of the bow. Set aside.

Line of the three layers of the bow so they are centered on top of each other. Tape one side of the square with washi tape. This will help the layers stay in place when you fold them.


Fold each square back 1/4″ and crease well. Continue folding into an accordion making sure that the folds are evenly creased. This is where a bone folder comes in handy—it will help you make sharp creases.

Once folded, wrap a strip around the middle of the accordion and secure with double-sided tape. Fan out the accordion to make a bow shape.


I loved mixing up the layers and patterns to create something fun yet complementary. So fun!
Love all things wrapping? Check out the Wrapping Tips page and follow my Gift Wrap board on Pinterest—it’s full of cute and pretty ideas from all over the blogosphere.

